Windows
The server interacts with commands via SSH and transfers files via SFTP. Different SSH and SFTP clients are recommended for different operating systems.
It is recommended to use Xshell and Xftp to connect to the server. The free version can be downloaded via this link. The user interface is relatively user-friendly and easy to use.
However, since Xshell and Xftp are paid software with limited features in the free version, you can consider using VS Code with an SSH plugin as an SSH client and WinSCP as an SFTP client after you are familiar with SSH and SFTP operations.
IP Whitelist
Since the server may be configured to prevent access from external networks (all servers in this center have external network access disabled), please first declare up to 3 commonly used IP addresses to the administrator to exempt the requirement for internal network login.
How to obtain a public IP address: ip4.me
Please do not query while using a proxy or VPN. Otherwise, you may not be able to find the IP address, or it may return the IP address of a public data center.
Some teams can use a jump server to bypass the restrictions. Please consult the IT administrator of your team for details.
PolyU Users
If you are a PolyU user, please quit all third-party antivirus software before connecting, keeping only the built-in Windows Defender, in order to pass the GlobalProtect VPN security check.
SSH
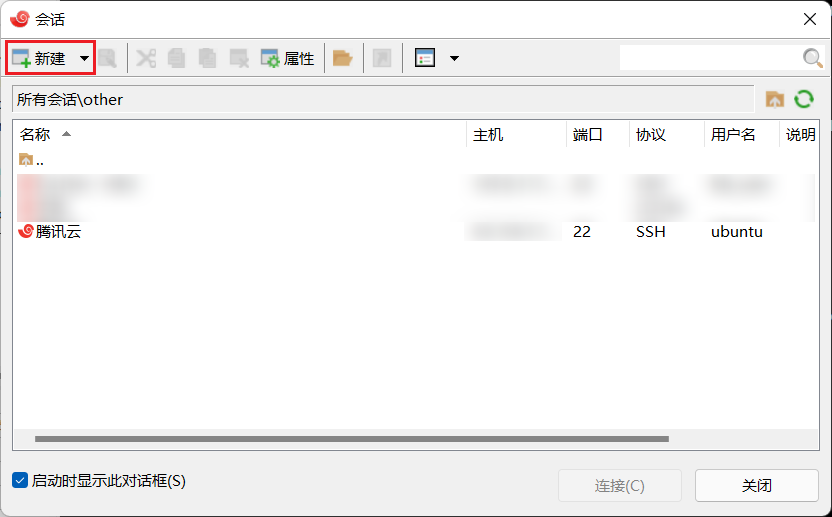
- Create a new session.
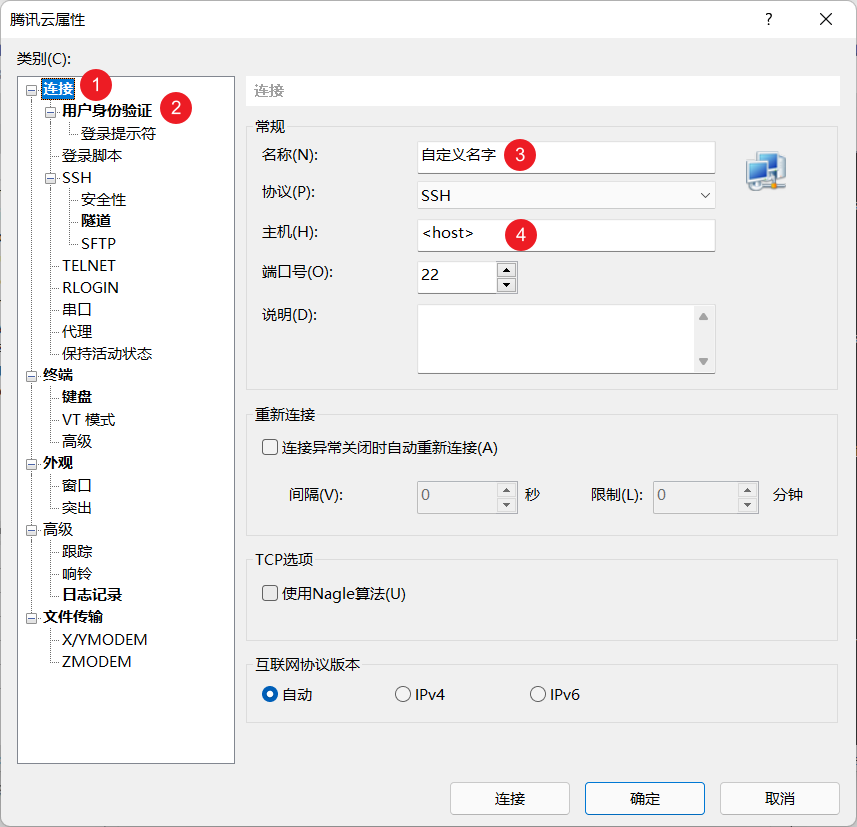
- Enter the connection configuration.
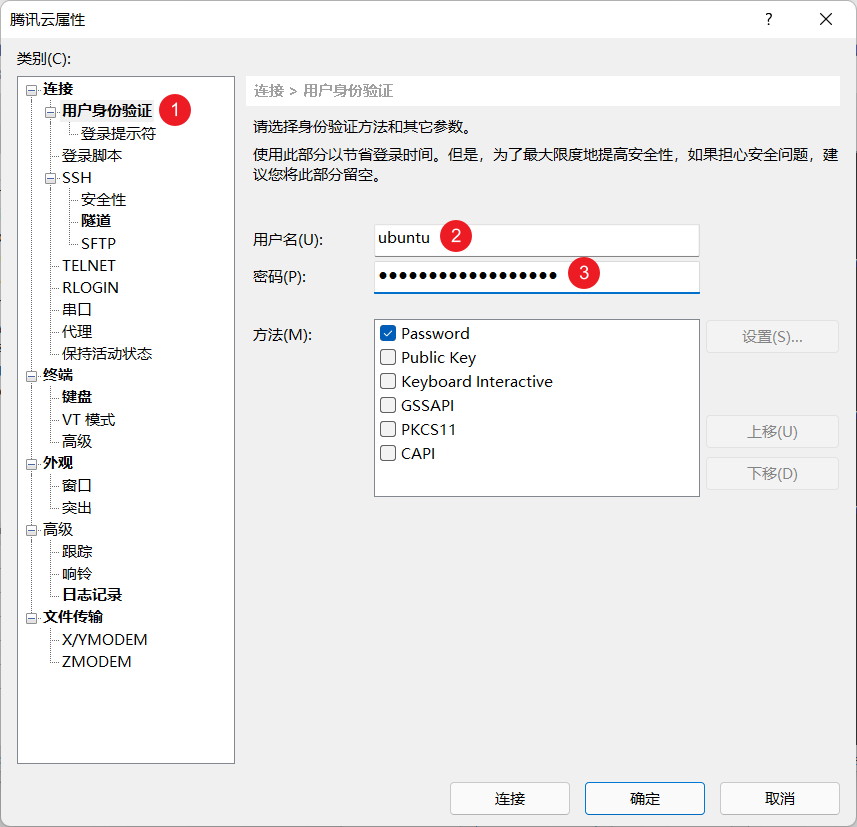
- Enter the username and password.
- Click "OK" to save the configuration to the session manager. Double-click the configuration in the session manager to log in to the server. The appearance of
<username>@<host>indicates successful login.

Cannot connect to 'http://xxx.xxx.xxx'
The connection for SSH and SFTP does not use the HTTP protocol. Simply enter xxx.xxx.xxx in the Host field; no additional protocol needs to be added (unless your server administrator explicitly tells you that you need one).
WARNING: REMOTE HOST IDENTIFICATION HAS CHANGED!
This error message indicates that the remote server's key has been changed (e.g., the system was reinstalled, or a new key was generated). In this case, you need to delete the public key of this server from your system's known_hosts file.
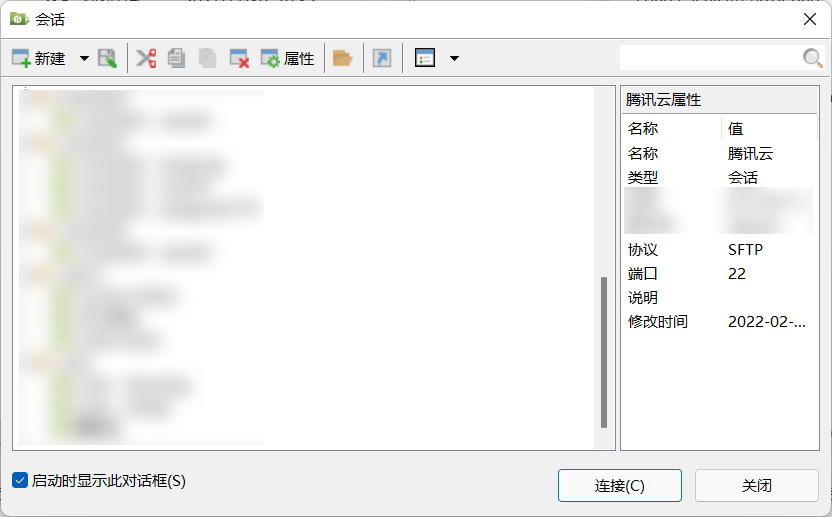
SFTP
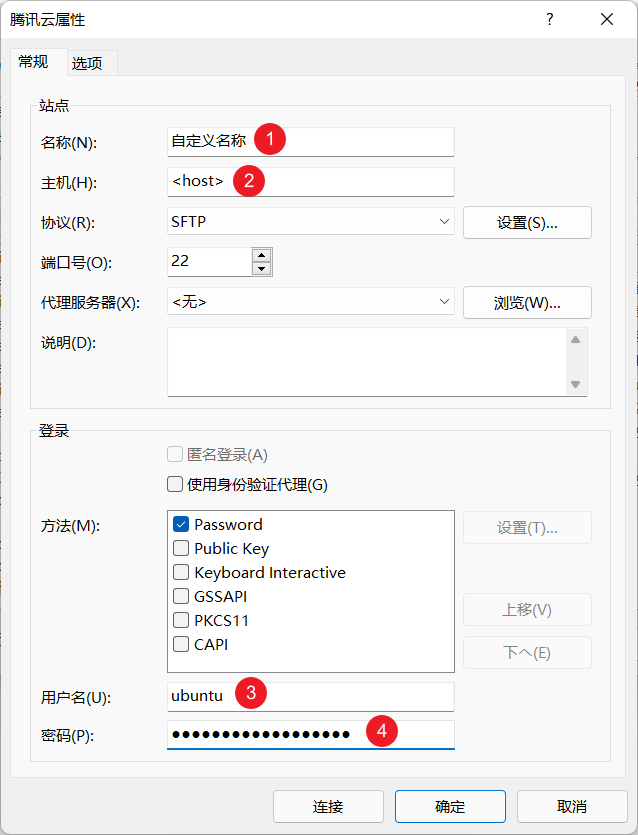
- Start Xftp. Enter the configuration and click "Connect" to enter the file management interface.
Cannot connect to 'http://xxx.xxx.xxx'
The connection for SSH and SFTP does not use the HTTP protocol. Simply enter xxx.xxx.xxx in the Host field; no additional protocol needs to be added (unless your server administrator explicitly tells you that you need one).
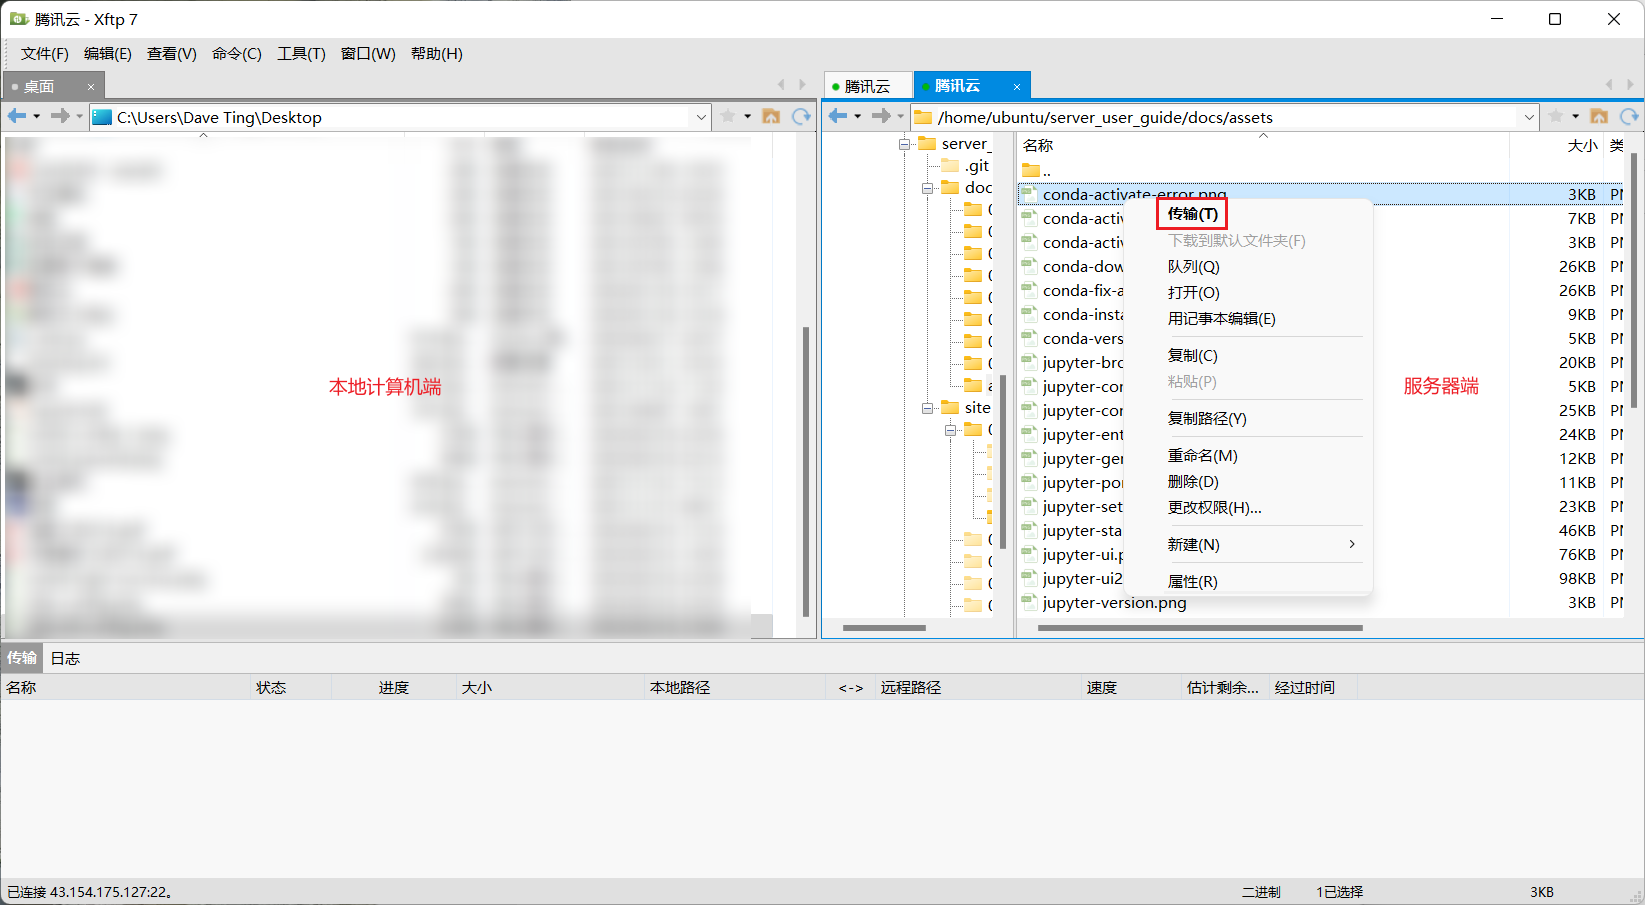
- You can then view and log in to the saved configurations here.
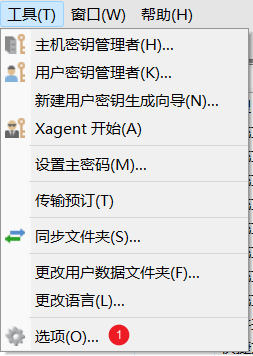
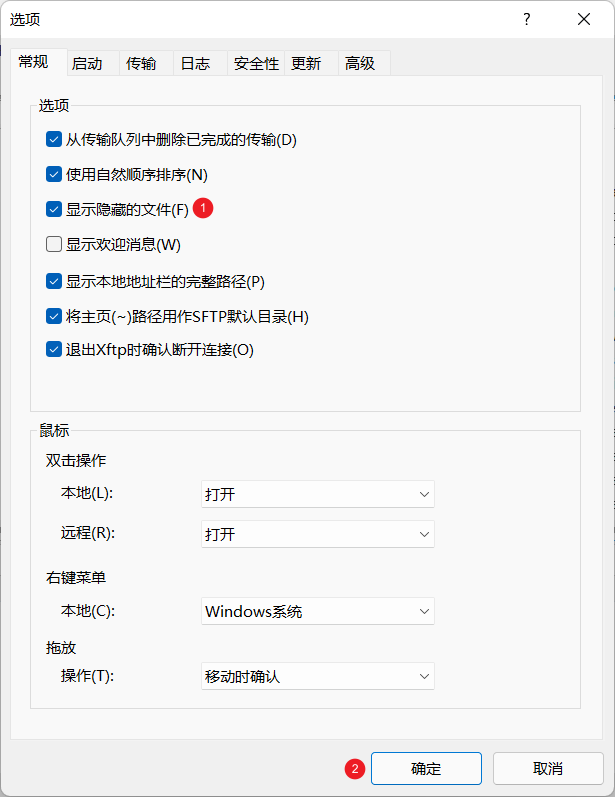
- Set to display hidden files.
- Right-click on a file to transfer it between the local machine and the server.
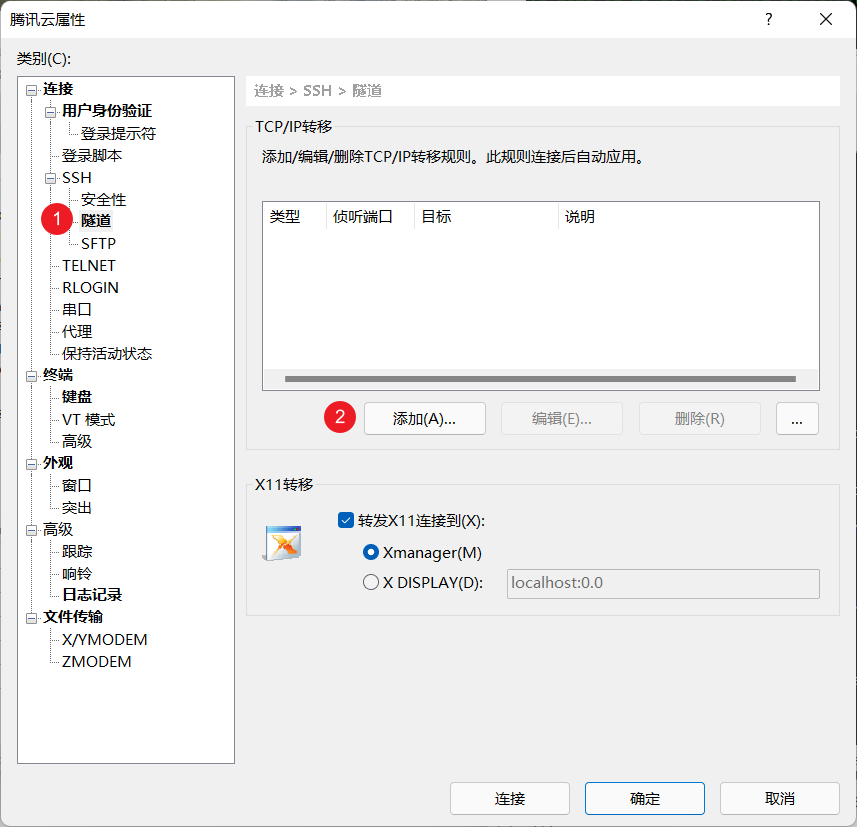
Port Listening
Why is port listening necessary?
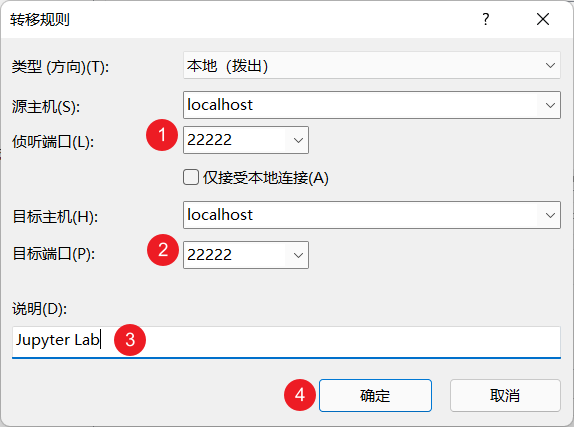
This setting is crucial for using Jupyter Lab. Please complete this step before configuring Jupyter Lab. Please apply for a port number from the administrator, and you can choose any number between 10000-65535. This example uses port 22222.
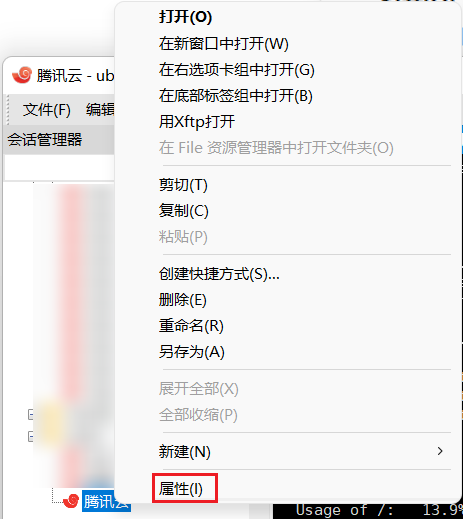
- Right-click in the session manager and go to the properties of the session configuration.
- Add a port listening rule.
- Reconnect the session to activate port listening.